[Photoshop] Best Practices when making Gauges and Needles
Depending on your project you might have to create a gauge or even a cluster of gauges.
Our designers and developers have had to create many of these over the years and we wanted to share a couple of quick best practices in order to make the process smoother for your project.
Photoshop
Firstly, it’s important to have the needle in a folder that’s shared with another layer that just contains a square. Of course, follow the naming convention outlined in this article:
So in this case we’ll name the folder pointer_control
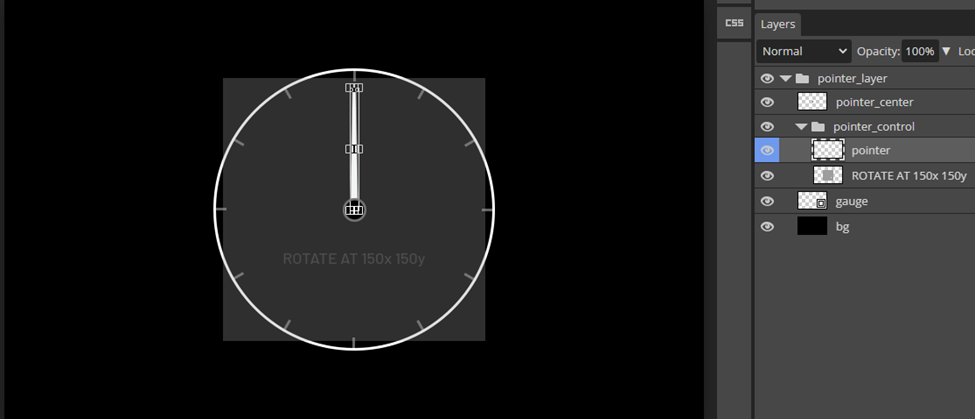
The purpose of this square is just to set the control size for the region where the needle will be rotating. This makes it so that the needle will not clip when it’s being rotated in Storyboard.

Storyboard Designer
The square also allows for easy setting of the needle’s rotation point. Since we’ve already established that the whole square will be the area where the needle rotates, you simply need to set the rotation point of the needle to be the center of the square.
It’s always a good idea to manually specify the center X and Center Y, as opposed to using “rotate around center of control” in these cases for better results:

You can download the PSD used in this article here: Download
Comments
Please sign in to leave a comment.