Experience multi-market demo applications built with Storyboard on your favorite platform. Crank Software demo images showcase Storyboard's design and development capabilities and the application potential of popular platforms. Download the demo image that corresponds with your hardware, which includes everything you need to get and up and running in minutes.
Link:Demo Image
Image Name: CrankSoftware_demo_iMX8MQ-v6.0.0.sdcard
Rendering Technology: OpenGL
Demo Resolution: 1280 x 720
Operating System: Linux
This demo image includes the following demos:
Demo Launcher
IoT - Smart Home
Movie Kiosk
Automotive 3D Instrument Cluster
To copy the demo image to an SD card under Linux you first need to find the name of the attached SD card located under /dev/. You can then use the dd utility to copy the demo image to a 4Gb (or greater) SD card.
dd if="CrankSoftware_demo_boardname.sdcard" of="/dev/sdX" bs=1M
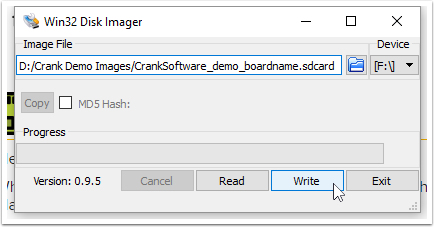
To copy the demo image to an SD card under Windows you can use the Win32 Disk Imager utility.
Specify the image file to copy
Specify the SD card device
Click the Write button
Each demo image contains all of the software needed to boot and run the card on the supported devices. Simply place the card in the appropriate SD card slot and power on the board. The cards will auto boot into the Crank Software Demo Launcher.
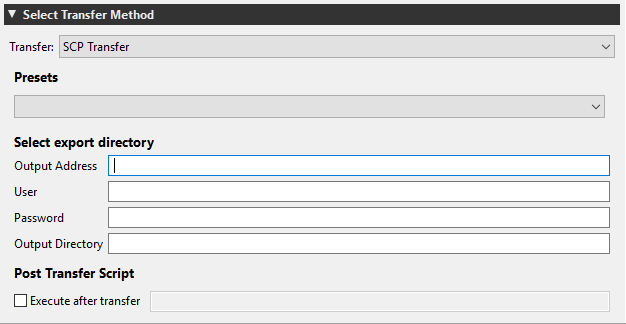
You can export a Storyboard application directly to a target from within Storyboard Designer.
When your application is ready to export, click on the Storyboard Application Export button.

Choose SCP Transfer as the transfer method.
Enter the export directory information for the application target. For this demo image we created a /usr/crank/scp directory.
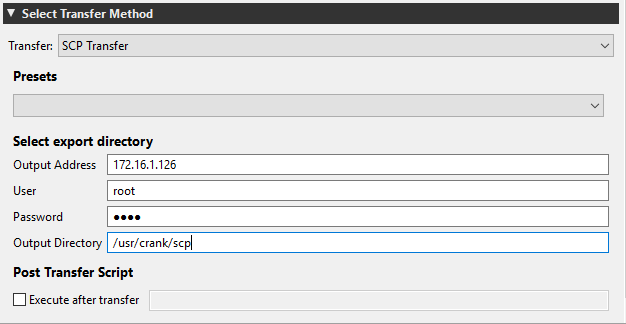
You can also execute your Storyboard application after it has been transferred to the target. Check the Execute after transfer checkbox and type the path to the script that will execute the application. For this demo image we created a /usr/crank/storyboard_scp.sh script for you.

By default the Linux console is disabled to improve performance and to prevent any display artifacts between application transitions. To re-enable the console do the following:
Connect a serial cable board
Interrupt the U-Boot startup sequence
env edit console
Switch ttymxc1 to ttymxc0
env save
To disable the console, repeat the above steps but instead switch ttymxc0 to ttymxc1.